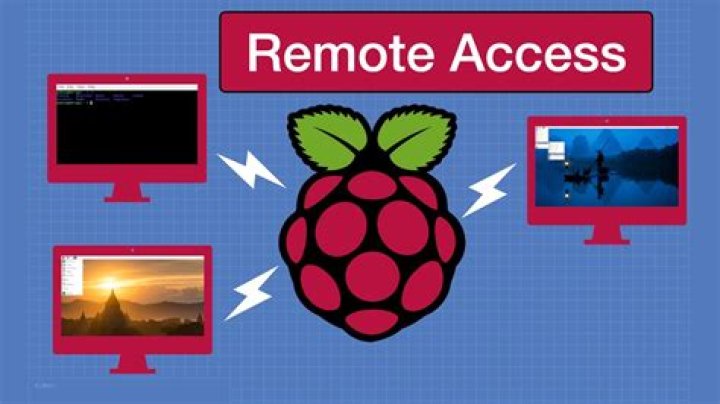
Remote access to a Raspberry Pi via the internet has become a popular solution for managing and monitoring devices from anywhere in the world. Whether you're a hobbyist or a professional, having the ability to access your Raspberry Pi remotely can significantly enhance your productivity and flexibility. In this article, we will explore how to set up Raspberry Pi remote access securely and efficiently.
Raspberry Pi remote access via the internet is a powerful tool for tech enthusiasts and developers. This functionality allows users to control their devices remotely, making it easier to manage servers, IoT projects, and more. With the growing demand for remote work and device management, understanding how to configure and secure this setup is essential.
In this guide, we will cover everything you need to know about setting up Raspberry Pi remote access via the internet, including step-by-step instructions, security considerations, and troubleshooting tips. Whether you're new to Raspberry Pi or an experienced user, this article will provide valuable insights to help you get started.
Introduction to Raspberry Pi Remote Access
Raspberry Pi remote access via the internet opens up endless possibilities for users. Whether you're managing a home server, monitoring IoT devices, or working on remote projects, this feature allows you to interact with your Raspberry Pi from anywhere. By setting up remote access, you can perform tasks such as file transfers, running scripts, and monitoring system performance without being physically present.
What is Raspberry Pi?
Raspberry Pi is a small, affordable computer that can be used for a variety of applications, including home automation, media centers, and educational projects. Its versatility and affordability make it a popular choice for both beginners and advanced users. With remote access, you can unlock the full potential of your Raspberry Pi by managing it from any location.
Benefits of Remote Access
- Increased flexibility in managing your devices.
- Ability to troubleshoot and resolve issues remotely.
- Improved productivity by accessing files and applications from anywhere.
Why Use Raspberry Pi Remote Access?
There are numerous reasons why you might want to set up Raspberry Pi remote access via the internet. For example, if you're running a web server or hosting applications on your Raspberry Pi, remote access allows you to monitor and manage these services without being physically present. Additionally, remote access can be useful for troubleshooting issues, updating software, or performing routine maintenance tasks.
Use Cases for Raspberry Pi Remote Access
Some common use cases for Raspberry Pi remote access include:
- Managing a home server or NAS (Network-Attached Storage).
- Monitoring IoT devices and sensors.
- Accessing files and applications from remote locations.
- Running scripts and automating tasks remotely.
Prerequisites for Remote Access
Before you can set up Raspberry Pi remote access via the internet, there are a few prerequisites you need to meet. These include:
- A Raspberry Pi with Raspbian or another compatible operating system installed.
- An active internet connection for both your Raspberry Pi and the device you'll use to access it remotely.
- A static IP address or a dynamic DNS service to ensure consistent connectivity.
- A basic understanding of networking and command-line operations.
Choosing the Right Raspberry Pi Model
When selecting a Raspberry Pi model for remote access, consider factors such as processing power, memory, and connectivity options. Models like the Raspberry Pi 4 or Raspberry Pi 3 B+ offer better performance and more features compared to older models, making them ideal for remote access applications.
Setting Up SSH for Remote Access
SSH (Secure Shell) is one of the most common methods for accessing a Raspberry Pi remotely. It provides a secure and encrypted connection between your device and the Raspberry Pi. To set up SSH, follow these steps:
Enabling SSH on Raspberry Pi
- Boot your Raspberry Pi and log in to the operating system.
- Open the terminal and type the following command:
sudo raspi-config. - Use the arrow keys to navigate to "Interfacing Options" and press Enter.
- Select "SSH" and enable it by choosing "Yes."
- Reboot your Raspberry Pi to apply the changes.
Connecting to Raspberry Pi via SSH
Once SSH is enabled, you can connect to your Raspberry Pi using an SSH client like PuTTY (for Windows) or the terminal (for macOS and Linux). Use the following command to establish a connection:
ssh pi@
Configuring Port Forwarding
Port forwarding is a crucial step in setting up Raspberry Pi remote access via the internet. It allows you to direct incoming traffic from the internet to your Raspberry Pi's local network. Here's how you can configure port forwarding:
Steps to Configure Port Forwarding
- Log in to your router's admin panel using a web browser.
- Locate the "Port Forwarding" or "Virtual Servers" section in the router settings.
- Add a new rule by specifying the external port (e.g., 22 for SSH) and the internal IP address of your Raspberry Pi.
- Save the changes and test the connection by accessing your Raspberry Pi from an external network.
Using Dynamic DNS for Remote Access
Dynamic DNS (DDNS) is a service that maps your dynamic IP address to a static domain name, making it easier to access your Raspberry Pi remotely. If your ISP assigns a dynamic IP address to your internet connection, using DDNS can help ensure consistent connectivity.
Setting Up Dynamic DNS
- Sign up for a DDNS service provider such as No-IP or DuckDNS.
- Create a hostname and link it to your Raspberry Pi's IP address.
- Install the DDNS client software on your Raspberry Pi to update the hostname automatically when your IP address changes.
Securing Your Remote Connection
Security is a critical aspect of Raspberry Pi remote access via the internet. To protect your device from unauthorized access, consider implementing the following best practices:
Tips for Securing Your Remote Connection
- Change the default SSH port (22) to a non-standard port to reduce the risk of automated attacks.
- Use strong passwords or implement SSH key-based authentication for added security.
- Enable a firewall to block unwanted traffic and restrict access to specific IP addresses.
- Regularly update your Raspberry Pi's operating system and software to patch vulnerabilities.
Remote Access Tools and Software
In addition to SSH, there are several other tools and software you can use for Raspberry Pi remote access via the internet. Some popular options include:
Popular Remote Access Tools
- VNC (Virtual Network Computing): Allows you to access the graphical desktop of your Raspberry Pi remotely.
- TeamViewer: A user-friendly remote access solution that supports both command-line and graphical interfaces.
- ngrok: A tool that creates secure tunnels to your Raspberry Pi, enabling remote access without the need for port forwarding.
Common Issues and Troubleshooting
While setting up Raspberry Pi remote access via the internet, you may encounter some common issues. Here are a few troubleshooting tips to help you resolve them:
Troubleshooting Tips
- Check your Raspberry Pi's IP address and ensure it matches the one specified in your port forwarding rules.
- Verify that SSH is enabled and the necessary ports are open on your router.
- Test the connection from a different network to rule out local network issues.
Conclusion and Next Steps
Raspberry Pi remote access via the internet is a powerful feature that can enhance your productivity and flexibility. By following the steps outlined in this guide, you can securely and efficiently set up remote access for your Raspberry Pi. Remember to prioritize security and regularly update your device to ensure a safe and reliable connection.
We encourage you to share your experience with Raspberry Pi remote access in the comments below. Additionally, feel free to explore other articles on our site for more tips and tutorials on Raspberry Pi and related technologies.
References:


