Raspberry Pi 5 video streaming has become a popular topic among tech enthusiasts and professionals alike. Whether you're looking to set up a home surveillance system or want to create a low-cost media server, the Raspberry Pi 5 offers endless possibilities for video streaming applications. In this article, we will explore how to harness the power of the Raspberry Pi 5 for video streaming, covering everything from setup to optimization techniques.
Video streaming is no longer just for tech giants like Netflix or YouTube. With the advent of powerful yet affordable devices like the Raspberry Pi 5, anyone can create their own video streaming setup. This versatile single-board computer is perfect for hobbyists, developers, and even businesses looking to implement custom video streaming solutions.
This guide aims to provide you with all the necessary information to get started with Raspberry Pi 5 video streaming. We will cover the basics of the Raspberry Pi 5, its specifications, and step-by-step instructions for setting up a video streaming server. By the end of this article, you'll be equipped with the knowledge to build your own Raspberry Pi 5-based video streaming system.
Raspberry Pi 5 Overview
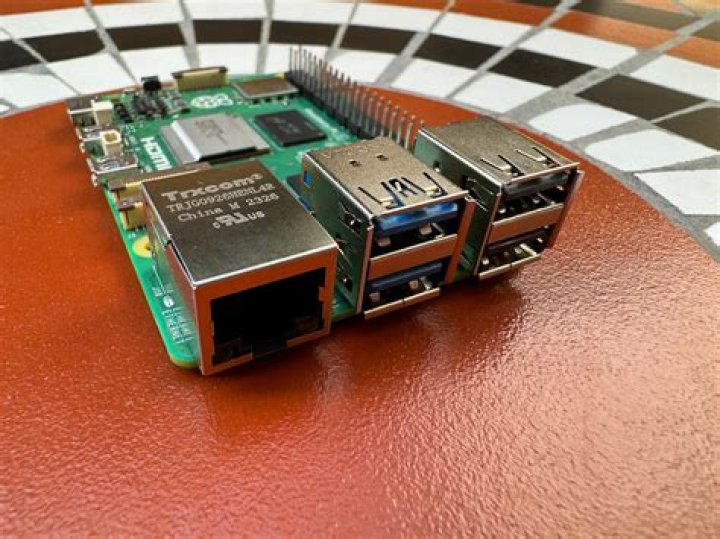
The Raspberry Pi 5 represents the latest iteration in the Raspberry Pi series, offering improved performance, connectivity, and features. Designed for both beginners and advanced users, the Raspberry Pi 5 is a powerful single-board computer capable of handling various tasks, including video streaming.
Key Features of Raspberry Pi 5
- Advanced processor for faster performance
- Improved Wi-Fi and Bluetooth capabilities
- Multiple USB ports for external devices
- Support for high-resolution displays
These features make the Raspberry Pi 5 an ideal choice for video streaming applications, providing the necessary power and connectivity to ensure smooth and reliable streaming.
Hardware Specifications
Understanding the hardware specifications of the Raspberry Pi 5 is crucial for optimizing its performance in video streaming applications. Below is a detailed breakdown of the key components:
Raspberry Pi 5 Specifications
- Processor: Quad-core Cortex-A72 (ARM v8) 64-bit SoC @ 1.8GHz
- RAM: 8GB LPDDR4-3200
- Connectivity: Dual-band Wi-Fi (2.4GHz and 5GHz), Bluetooth 5.0
- Ports: 2x USB 3.0, 2x USB 2.0, HDMI, Ethernet
- Storage: MicroSD card slot
These specifications highlight the Raspberry Pi 5's ability to handle resource-intensive tasks such as video streaming with ease.
Raspberry Pi 5 Setup
Before diving into video streaming, it's essential to set up your Raspberry Pi 5 properly. This involves installing the operating system, configuring network settings, and ensuring all hardware components are functioning correctly.
Steps to Set Up Raspberry Pi 5
- Download the Raspberry Pi OS from the official website.
- Use a tool like Balena Etcher to flash the OS onto a microSD card.
- Insert the microSD card into the Raspberry Pi 5 and power it on.
- Configure Wi-Fi and other settings through the Raspberry Pi Configuration tool.
Once your Raspberry Pi 5 is set up, you can proceed to install the necessary software for video streaming.
Video Streaming Software
Choosing the right software is critical for successful video streaming on the Raspberry Pi 5. Several options are available, each catering to different needs and preferences.
Popular Video Streaming Software
- VLC Media Player: A versatile media player that supports streaming.
- FFmpeg: A powerful command-line tool for encoding and streaming video.
- Motion: A video motion detection software ideal for surveillance applications.
These tools provide flexibility and customization options, allowing you to tailor your video streaming setup to your specific requirements.
Setting Up a Streaming Server
With the Raspberry Pi 5 and the appropriate software in place, the next step is to set up a streaming server. This involves configuring the software and ensuring the server is accessible from other devices.
Configuring the Streaming Server
- Install the chosen streaming software on your Raspberry Pi 5.
- Configure the software settings to match your streaming requirements.
- Test the server by connecting to it from another device on the same network.
Proper configuration of the streaming server is essential for achieving optimal performance and reliability.
Optimizing Video Streaming
Optimization is key to ensuring smooth and high-quality video streaming. Several techniques can be employed to enhance the performance of your Raspberry Pi 5 video streaming setup.
Tips for Optimizing Video Streaming
- Use a high-speed microSD card for faster data access.
- Adjust video resolution and bitrate settings to balance quality and bandwidth.
- Ensure a stable internet connection to minimize buffering.
By implementing these optimization techniques, you can significantly improve the quality and reliability of your video streaming experience.
Use Cases for Video Streaming
Raspberry Pi 5 video streaming can be applied in various scenarios, from personal projects to professional applications. Below are some common use cases:
Common Use Cases
- Home Surveillance: Set up cameras around your home and stream live footage to your devices.
- Live Streaming: Broadcast events or performances to a global audience.
- Remote Monitoring: Monitor remote locations or equipment in real-time.
These use cases demonstrate the versatility and potential of Raspberry Pi 5 video streaming in solving real-world problems.
Troubleshooting Common Issues
Despite careful planning and setup, issues may arise during video streaming. Below are some common problems and their solutions:
Solutions to Common Issues
- Buffering: Ensure a stable internet connection and adjust video settings.
- Low Quality: Increase resolution and bitrate settings if your bandwidth allows.
- Connection Problems: Check network settings and ensure proper configuration.
By addressing these issues promptly, you can maintain a smooth and uninterrupted video streaming experience.
Raspberry Pi 5 vs Other Models
When considering video streaming, it's important to understand how the Raspberry Pi 5 compares to other models in the Raspberry Pi series. The Raspberry Pi 5 offers several advantages that make it ideal for video streaming applications.
Advantages of Raspberry Pi 5
- Higher processing power for smoother streaming.
- Improved connectivity options for better network performance.
- More RAM for handling multiple tasks simultaneously.
These advantages position the Raspberry Pi 5 as the go-to choice for demanding video streaming applications.
Conclusion
Raspberry Pi 5 video streaming offers a cost-effective and versatile solution for a wide range of applications. By following the steps outlined in this guide, you can successfully set up and optimize your Raspberry Pi 5 for video streaming. Remember to choose the right software, configure your settings properly, and implement optimization techniques to ensure the best possible performance.
We encourage you to share your experience with Raspberry Pi 5 video streaming in the comments below. Additionally, feel free to explore other articles on our site for more tips and tricks on using the Raspberry Pi 5. Happy streaming!


