In today's interconnected world, SSH RemoteIoT Raspberry Pi download has become a crucial tool for managing and securing IoT devices remotely. As technology evolves, understanding how to implement secure remote access using SSH on a Raspberry Pi is more important than ever. Whether you're a hobbyist, developer, or professional in the IoT space, this guide will provide you with the knowledge and skills to download, configure, and manage SSH RemoteIoT on your Raspberry Pi.
This article dives deep into the process of downloading and setting up SSH for Raspberry Pi devices in IoT environments. We'll cover everything from basic concepts to advanced configurations, ensuring that you have a complete understanding of the topic. By the end of this guide, you'll be equipped with the expertise to secure your IoT network effectively.
As we explore the intricacies of SSH RemoteIoT Raspberry Pi download, we'll also touch upon the importance of cybersecurity and best practices to protect your devices. Let's get started by understanding the basics of SSH and its role in IoT applications.
Table of Contents
- What is SSH?
- Raspberry Pi Overview
- Why SSH for IoT?
- Downloading SSH for Raspberry Pi
- Configuring SSH on Raspberry Pi
- Securing Your SSH Connection
- Advanced Features of SSH
- Troubleshooting Common Issues
- Best Practices for SSH in IoT
- Conclusion
What is SSH?
SSH, or Secure Shell, is a cryptographic network protocol designed for secure communication over unsecured networks. It provides a secure way to access remote devices, transfer files, and execute commands. SSH is widely used in IT infrastructure and is particularly valuable in the Internet of Things (IoT) domain due to its robust security features.
Key Features of SSH
- Encryption: SSH encrypts all data transmitted between devices, ensuring privacy and integrity.
- Authentication: It supports various authentication methods, such as password-based and public-key authentication.
- Portability: SSH can be used across different platforms, making it versatile for diverse applications.
Understanding SSH is the first step in leveraging its capabilities for IoT applications, especially when working with devices like the Raspberry Pi.
Raspberry Pi Overview
The Raspberry Pi is a low-cost, credit-card-sized computer that has gained immense popularity among hobbyists, educators, and professionals alike. Its versatility and affordability make it an ideal platform for IoT projects. Equipped with a range of interfaces and capabilities, the Raspberry Pi can be configured to serve various purposes, from home automation to industrial applications.
Components of Raspberry Pi
- Processor: A powerful ARM-based processor capable of running modern operating systems.
- Memory: Varies depending on the model, ranging from 512MB to 8GB.
- Connectivity: Built-in Wi-Fi, Bluetooth, and Ethernet for seamless networking.
With its compact design and extensive community support, the Raspberry Pi is a perfect candidate for implementing SSH-based remote access solutions.
Why SSH for IoT?
When it comes to securing IoT devices, SSH offers several advantages over other remote access methods. Its encryption capabilities ensure that sensitive data is protected from unauthorized access, while its robust authentication mechanisms provide an additional layer of security.
Using SSH for IoT devices like the Raspberry Pi allows users to:
- Remotely manage and monitor devices without physical access.
- Execute commands securely, even over unsecured networks.
- Transfer files between devices using the Secure Copy Protocol (SCP).
These features make SSH an essential tool for anyone working with IoT devices, especially in environments where security is paramount.
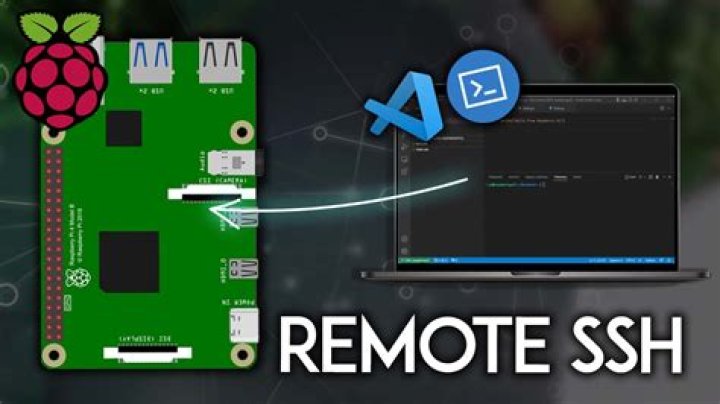
Downloading SSH for Raspberry Pi
Before you can use SSH on your Raspberry Pi, you need to ensure that it is installed and enabled. Fortunately, most Raspberry Pi operating systems, such as Raspbian, come with SSH pre-installed. However, you may need to enable it manually.
Steps to Enable SSH
- Boot your Raspberry Pi and log in to the operating system.
- Open the terminal and type the following command:
sudo raspi-config. - Select "Interfacing Options" and navigate to "SSH".
- Choose "Enable" and reboot your Raspberry Pi for the changes to take effect.
If you're using a headless setup (without a monitor or keyboard), you can enable SSH by placing an empty file named "ssh" in the boot partition of your Raspberry Pi's SD card.
Configuring SSH on Raspberry Pi
Once SSH is enabled, you can configure it to suit your specific needs. The SSH configuration file, located at /etc/ssh/sshd_config, allows you to customize various settings, such as port numbers, authentication methods, and access restrictions.
Customizing SSH Settings
To modify the SSH configuration:
- Open the terminal and type:
sudo nano /etc/ssh/sshd_config. - Edit the desired settings, such as changing the default port (22) or disabling password authentication.
- Save the file and restart the SSH service using:
sudo service ssh restart.
Proper configuration is essential for ensuring that your SSH connection remains secure and functional.
Securing Your SSH Connection
While SSH provides a secure method of remote access, it's important to take additional steps to protect your Raspberry Pi from potential threats. Implementing strong security measures can help safeguard your IoT devices from unauthorized access.
Security Best Practices
- Use strong, unique passwords for all user accounts.
- Enable public-key authentication and disable password-based login.
- Regularly update your Raspberry Pi's operating system and software.
By following these practices, you can significantly enhance the security of your SSH-based IoT setup.
Advanced Features of SSH
SSH offers a range of advanced features that can enhance its functionality and usability in IoT applications. These features include tunneling, port forwarding, and certificate-based authentication.
Tunneling with SSH
SSH tunneling allows you to securely transmit data between devices by encapsulating it within an encrypted SSH connection. This is particularly useful for accessing services that are not natively secure, such as HTTP or FTP.
To create an SSH tunnel:
- Use the following command:
ssh -L local_port:destination_host:destination_port user@ssh_server. - Replace the placeholders with your specific details.
This setup enables you to securely access remote services as if they were local.
Troubleshooting Common Issues
Despite its robustness, SSH can sometimes encounter issues that may affect its performance. Understanding common problems and their solutions can help you quickly resolve any difficulties you may encounter.
Common Issues and Solutions
- Connection Refused: Ensure that the SSH service is running and that the correct port is being used.
- Authentication Failed: Double-check your username, password, or key file for accuracy.
- Timeout Errors: Verify network connectivity and firewall settings.
By addressing these issues promptly, you can maintain a stable and reliable SSH connection for your IoT devices.
Best Practices for SSH in IoT
To maximize the effectiveness and security of SSH in IoT applications, it's important to adhere to best practices. These guidelines will help you achieve optimal performance while minimizing risks.
Key Best Practices
- Limit user access to only those who require it.
- Regularly audit SSH logs for suspicious activity.
- Use a firewall to restrict access to specific IP addresses.
By following these practices, you can ensure that your IoT devices remain secure and operational.
Conclusion
In conclusion, mastering SSH RemoteIoT Raspberry Pi download is essential for anyone involved in IoT development and management. This guide has provided a comprehensive overview of SSH, its applications in IoT, and the steps required to download, configure, and secure it on a Raspberry Pi.
We encourage you to put this knowledge into practice and explore the full potential of SSH in your IoT projects. Don't forget to share your experiences and insights in the comments section below. Additionally, feel free to explore other articles on our site for more valuable information on IoT and related technologies.
Thank you for reading, and happy tinkering!


