SSH into Raspberry Pi from anywhere is a powerful tool that allows you to remotely access your Raspberry Pi, even when you're not in the same physical location. This capability opens up countless possibilities for managing your device, running scripts, and performing maintenance tasks. Whether you're a hobbyist or a professional developer, mastering this technique can significantly enhance your productivity and flexibility.
Remote access to your Raspberry Pi can be especially useful for monitoring servers, automating tasks, or controlling IoT devices. However, setting up SSH to work securely from anywhere requires careful planning and execution. In this article, we will guide you step-by-step through the process, ensuring that your connection remains both reliable and secure.
By the end of this guide, you'll have the knowledge and tools necessary to SSH into your Raspberry Pi from anywhere in the world. Let's dive in and explore the world of remote access with Raspberry Pi.
Introduction to SSH and Raspberry Pi
SSH, or Secure Shell, is a network protocol that allows you to securely connect to another computer over an unsecured network. It provides a way to issue commands, transfer files, and manage remote systems as if you were sitting in front of them. The Raspberry Pi, being a versatile and affordable single-board computer, is an ideal platform for experimenting with SSH.
Using SSH, you can remotely control your Raspberry Pi from any device with internet access. This capability is particularly useful for projects that require off-site management, such as home automation systems, weather stations, or remote servers.
Why Use SSH for Raspberry Pi?
SSH offers several advantages for Raspberry Pi users:
- Security: SSH encrypts all data transmitted between your local machine and the Raspberry Pi, ensuring that sensitive information remains protected.
- Convenience: With SSH, you can manage your Raspberry Pi without needing physical access to the device.
- Flexibility: SSH supports a wide range of commands and tools, making it suitable for various applications, from simple file transfers to complex system management tasks.
Setting Up SSH on Raspberry Pi
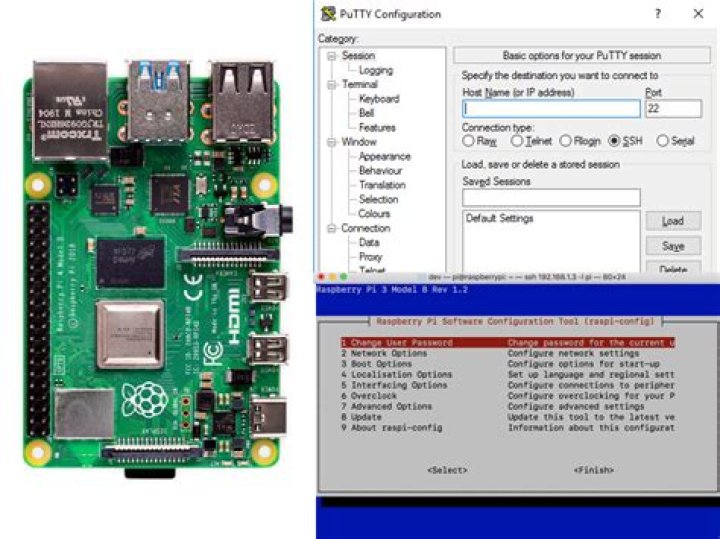
Before you can SSH into your Raspberry Pi from anywhere, you need to enable SSH on the device. Fortunately, this process is straightforward and can be completed in just a few steps.
Step 1: Enable SSH on Raspberry Pi
To enable SSH on your Raspberry Pi, follow these steps:
- Open the Raspberry Pi Configuration tool by typing
sudo raspi-configin the terminal. - Navigate to the "Interfacing Options" menu and select "SSH."
- Choose "Enable" to activate the SSH service.
- Reboot your Raspberry Pi to apply the changes.
Step 2: Determine the IP Address
Once SSH is enabled, you'll need to know the IP address of your Raspberry Pi. You can find this information by typing hostname -I in the terminal. This command will display the local IP address assigned to your device.
Securing Your SSH Connection
Security is paramount when setting up remote access to your Raspberry Pi. Without proper precautions, your device could become vulnerable to unauthorized access or attacks. Follow these best practices to secure your SSH connection:
Change the Default SSH Port
By default, SSH operates on port 22. Changing this port can help deter automated attacks. To modify the port, edit the SSH configuration file:
sudo nano /etc/ssh/sshd_config
Locate the line that specifies the port number and change it to a different value, such as 2222. Save the file and restart the SSH service:
sudo systemctl restart ssh
Disable Root Login
Disallowing root login adds an extra layer of security by requiring users to log in with a standard account and then escalate privileges if necessary. To disable root login, edit the SSH configuration file and set:
PermitRootLogin no
Configuring Port Forwarding
To access your Raspberry Pi from outside your local network, you'll need to configure port forwarding on your router. This process involves directing incoming traffic on a specific port to your Raspberry Pi's local IP address.
Steps to Configure Port Forwarding
- Log in to your router's admin interface using its IP address.
- Locate the port forwarding settings and create a new rule.
- Set the external port to match the SSH port you configured earlier (e.g., 2222).
- Set the internal IP address to the local IP of your Raspberry Pi.
- Save the changes and test the connection.
Using Dynamic DNS for Remote Access
Most home internet connections use dynamic IP addresses, which can change periodically. To maintain consistent access to your Raspberry Pi, consider using a Dynamic DNS (DDNS) service. DDNS updates your domain name with the current IP address of your router, ensuring that you can always reach your device.
Popular DDNS Services
Creating an SSH Tunnel
An SSH tunnel allows you to securely forward traffic between your local machine and the Raspberry Pi. This technique is particularly useful for accessing web interfaces or other services running on the remote device.
Example: Forwarding a Web Server
Suppose you're running a web server on your Raspberry Pi. To access it remotely, create an SSH tunnel with the following command:
ssh -L 8080:localhost:80 user@yourdomain.com
This command forwards traffic from port 8080 on your local machine to port 80 on the Raspberry Pi, allowing you to access the web server by navigating to http://localhost:8080.
Tools for Remote SSH Access
Several tools and applications can simplify the process of SSH-ing into your Raspberry Pi from anywhere:
Recommended Tools
- Putty: A popular SSH client for Windows users.
- Termius: A cross-platform SSH client with a user-friendly interface.
- SSHFS: A tool for mounting remote file systems over SSH.
Troubleshooting Common Issues
Even with careful setup, issues can arise when trying to SSH into your Raspberry Pi. Below are some common problems and their solutions:
Connection Timeout
Cause: The SSH port may not be open on your router or firewall.
Solution: Double-check your port forwarding settings and ensure that the SSH port is not blocked by any firewalls.
Permission Denied
Cause: Incorrect username or password.
Solution: Verify that you're using the correct credentials and that SSH is enabled on the Raspberry Pi.
Advanced SSH Techniques
Once you're comfortable with basic SSH operations, you can explore advanced techniques to further enhance your workflow:
Key-Based Authentication
Using SSH keys instead of passwords provides a more secure and convenient way to authenticate. To set up key-based authentication:
- Generate a key pair on your local machine:
ssh-keygen. - Copy the public key to your Raspberry Pi:
ssh-copy-id user@yourdomain.com. - Disable password authentication in the SSH configuration file.
SSH Config File
Creating an SSH config file can simplify connecting to multiple devices. Add entries for each device in ~/.ssh/config, specifying the hostname, port, and username.
Conclusion and Next Steps
In this guide, we've covered everything you need to know to SSH into your Raspberry Pi from anywhere. From setting up SSH and securing your connection to configuring port forwarding and using dynamic DNS, you now have the tools to manage your device remotely with confidence.
As you continue exploring the possibilities of remote access, consider experimenting with advanced techniques such as key-based authentication and SSH tunnels. These methods can further enhance both the security and functionality of your setup.
Don't forget to share your experiences and tips in the comments below. And if you enjoyed this article, feel free to explore other resources on our site for more Raspberry Pi projects and tutorials!
References:


