Controlling a Raspberry Pi remotely over the internet has become a powerful tool for developers, hobbyists, and professionals alike. This capability allows you to execute commands, manage devices, and automate processes from anywhere in the world. Whether you're managing a home automation system or running a server, learning how to send command to Raspberry Pi over the internet is a skill that can significantly enhance your project's functionality.
As the world becomes increasingly connected, the ability to interact with devices remotely is no longer a luxury but a necessity. The Raspberry Pi, with its affordability and versatility, has emerged as a popular choice for such applications. However, setting up a secure and reliable system to send commands to Raspberry Pi over the internet requires careful planning and execution.
In this article, we will delve into the steps, tools, and best practices for sending commands to your Raspberry Pi over the internet. From configuring your Raspberry Pi to ensuring security, we will cover everything you need to know to get started. Whether you're a beginner or an experienced user, this guide will equip you with the knowledge to control your Raspberry Pi remotely with confidence.
Introduction to Raspberry Pi Remote Control
Remote control of Raspberry Pi opens up endless possibilities for innovation and automation. The ability to send commands to Raspberry Pi over the internet allows you to interact with your device from anywhere, making it ideal for projects such as home automation, remote monitoring, and cloud computing. This section will introduce you to the basics of remote control and why it is essential for modern applications.
One of the primary advantages of controlling Raspberry Pi remotely is convenience. You no longer need physical access to the device to manage it. Additionally, remote control enables you to automate tasks, monitor sensors, and perform updates without being physically present. This capability is particularly useful for IoT (Internet of Things) projects where devices are often located in remote or inaccessible locations.
Before diving into the technical aspects, it's important to understand the key components involved in setting up remote control for your Raspberry Pi. These include network configuration, security protocols, and the tools you'll need to send commands effectively. By the end of this section, you'll have a solid foundation to proceed with the setup process.
Setting Up Your Raspberry Pi
Before you can send commands to your Raspberry Pi over the internet, you need to ensure that your device is properly configured. This involves installing the necessary software, setting up the operating system, and configuring network settings. In this section, we will walk you through the steps to prepare your Raspberry Pi for remote access.
Installing the Operating System
The first step is to install an operating system on your Raspberry Pi. The most popular choice is Raspberry Pi OS, which is specifically designed for the device. You can download the latest version from the official Raspberry Pi website and use a tool like Balena Etcher to flash the image onto an SD card.
- Download Raspberry Pi OS from the official website.
- Use Balena Etcher to write the image to an SD card.
- Insert the SD card into your Raspberry Pi and power it on.
Configuring Wi-Fi
To connect your Raspberry Pi to the internet, you need to configure Wi-Fi or Ethernet settings. If you're using Wi-Fi, you can set up the network credentials during the initial boot process or by editing the wpa_supplicant.conf file on the SD card.
For Ethernet, simply connect your Raspberry Pi to a network cable, and it will automatically obtain an IP address via DHCP.
Connecting Raspberry Pi to the Internet
Once your Raspberry Pi is set up, the next step is to ensure it is connected to the internet. A stable internet connection is crucial for sending commands to Raspberry Pi over the internet. In this section, we will discuss how to verify your connection and obtain the necessary details for remote access.
After connecting your Raspberry Pi to the internet, you need to find its local IP address. This can be done using the command "ifconfig" in the terminal. The IP address will typically start with "192.168" or "10.0" depending on your network configuration.
Obtaining a Static IP Address
To avoid issues with changing IP addresses, it's recommended to assign a static IP to your Raspberry Pi. This can be done by modifying the DHCP settings on your router or by configuring the network interface on the Raspberry Pi itself.
- Log in to your router's admin panel.
- Find the DHCP reservation section and assign a static IP to your Raspberry Pi's MAC address.
Methods to Send Command to Raspberry Pi
There are several methods to send commands to Raspberry Pi over the internet. The choice of method depends on your specific requirements, such as security, ease of use, and the type of commands you wish to execute. In this section, we will explore the most common methods and their advantages.
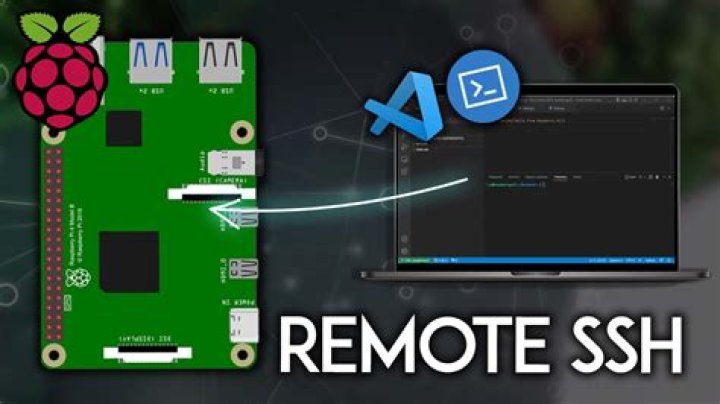
Using SSH (Secure Shell)
SSH is one of the most popular and secure methods for remote access. It allows you to execute commands directly on the Raspberry Pi's terminal from another computer. To use SSH, you need to enable it on your Raspberry Pi and configure port forwarding on your router.
Creating a Web Interface
Another method is to create a web interface that allows you to send commands through a browser. This approach is ideal for projects that require a user-friendly interface and can be accessed from any device with a web browser.
Implementing IoT Protocols
For more advanced applications, you can use IoT protocols like MQTT or HTTP to send commands to Raspberry Pi over the internet. These protocols are designed for low-bandwidth communication and are widely used in IoT projects.
Using SSH for Remote Access
SSH (Secure Shell) is a powerful tool for remotely controlling Raspberry Pi. It provides a secure and encrypted connection, ensuring that your commands are transmitted safely over the internet. In this section, we will guide you through the process of setting up and using SSH for remote access.
Enabling SSH on Raspberry Pi
To enable SSH on your Raspberry Pi, you can use the Raspberry Pi Configuration tool or modify the boot files. Simply create an empty file named "ssh" in the boot partition of your SD card, and SSH will be enabled on the next boot.
Configuring Port Forwarding
To access your Raspberry Pi from outside your local network, you need to configure port forwarding on your router. This involves directing incoming traffic on a specific port (usually 22 for SSH) to your Raspberry Pi's local IP address.
Creating a Web Interface
A web interface provides a user-friendly way to send commands to Raspberry Pi over the internet. By creating a simple web server on your Raspberry Pi, you can design a custom interface that allows you to control your device through a browser. In this section, we will discuss the steps to create a web interface.
Installing a Web Server
The first step is to install a web server on your Raspberry Pi. The most common choice is Apache, which can be installed using the command "sudo apt-get install apache2". Once installed, you can create HTML files in the /var/www/html directory to build your interface.
Adding Command Execution
To execute commands through the web interface, you can use a CGI script written in Python or Bash. This script will run the desired command on the Raspberry Pi and display the output on the web page.
Implementing IoT Protocols
IoT protocols like MQTT and HTTP offer advanced capabilities for sending commands to Raspberry Pi over the internet. These protocols are lightweight and efficient, making them ideal for IoT applications. In this section, we will explore how to implement these protocols on your Raspberry Pi.
Setting Up MQTT
MQTT (Message Queuing Telemetry Transport) is a lightweight protocol designed for low-bandwidth communication. To use MQTT, you need to install a broker (such as Mosquitto) on your Raspberry Pi and configure it to listen for incoming messages.
Using HTTP Requests
HTTP requests can be used to send commands to Raspberry Pi over the internet by creating a RESTful API. This involves writing a server-side script that listens for HTTP requests and executes the corresponding commands on the Raspberry Pi.
Ensuring Security
Security is a critical consideration when sending commands to Raspberry Pi over the internet. Without proper security measures, your device could be vulnerable to unauthorized access and attacks. In this section, we will discuss the best practices for securing your Raspberry Pi.
Using Strong Passwords
Always use strong and unique passwords for your Raspberry Pi. Avoid using default credentials and enable two-factor authentication if possible. Regularly update your passwords to minimize the risk of unauthorized access.
Configuring Firewalls
A firewall can help protect your Raspberry Pi from unauthorized access by blocking unwanted traffic. You can configure the firewall using tools like ufw (Uncomplicated Firewall) to allow only specific ports and IP addresses.
Troubleshooting Common Issues
As with any technology, issues may arise when sending commands to Raspberry Pi over the internet. In this section, we will address some common problems and provide solutions to help you troubleshoot effectively.
Connection Issues
If you're unable to connect to your Raspberry Pi, check your network settings and ensure that port forwarding is correctly configured. Verify that your Raspberry Pi is connected to the internet and that its IP address is accessible from outside your network.
Security Alerts
If you receive security alerts, review your firewall settings and ensure that only necessary ports are open. Regularly update your software and operating system to patch any vulnerabilities.
Conclusion
Sending commands to Raspberry Pi over the internet is a valuable skill that opens up a world of possibilities for automation and remote control. By following the steps outlined in this guide, you can set up a secure and reliable system to interact with your Raspberry Pi from anywhere in the world.
Remember to prioritize security and regularly update your device to protect it from potential threats. Whether you choose to use SSH, create a web interface, or implement IoT protocols, the key is to find the method that best suits your needs and project requirements.
We encourage you to share your experiences and ask questions in the comments section below. Additionally, explore other articles on our site for more tips and tutorials on Raspberry Pi and related technologies. Together, let's continue to innovate and push the boundaries of what's possible with remote control technology.