Accessing a Raspberry Pi (RPI) remotely is an essential skill for modern developers, educators, and hobbyists. Whether you're managing a home automation system, running a server, or collaborating on a project, remote access provides flexibility and convenience. In this guide, we will explore various methods to connect to your RPI from anywhere in the world.
Remote access to RPI opens up countless possibilities, from automating tasks to monitoring systems in real time. Whether you're a beginner or an experienced user, this article will provide step-by-step instructions, best practices, and troubleshooting tips to ensure a seamless connection.
As technology evolves, the demand for remote access solutions continues to grow. This guide will cover everything you need to know about setting up secure and reliable connections, ensuring your RPI remains accessible without compromising security. Let's dive in!
Introduction to Remote Access
Remote access refers to the ability to connect to a device or system from a different location. For Raspberry Pi users, this means being able to control and manage their RPI without being physically present. This capability is particularly useful for managing headless setups, where the RPI operates without a monitor, keyboard, or mouse.
In this section, we will discuss the basics of remote access and why it is important for RPI users. We'll also explore the tools and technologies that make remote access possible.
Why Choose Raspberry Pi?
Raspberry Pi is a versatile and affordable single-board computer that has gained immense popularity among developers, educators, and hobbyists. Its small size, low power consumption, and wide range of applications make it an ideal choice for projects that require remote access.
Benefits of Accessing RPI Remotely
Accessing your Raspberry Pi remotely offers several advantages:
- Convenience: Manage your RPI from anywhere in the world.
- Efficiency: Automate tasks and monitor systems in real time.
- Cost-Effective: Eliminate the need for additional hardware.
- Flexibility: Work on projects from multiple devices and locations.
System Requirements for Remote Access
Before setting up remote access, ensure your Raspberry Pi meets the following requirements:
- Raspberry Pi model (any version with network capabilities).
- Raspberry Pi OS or a compatible operating system.
- A stable internet connection.
- A computer or mobile device with remote access software installed.
In addition, it's important to configure your network settings and ensure your RPI is properly set up for remote connections.
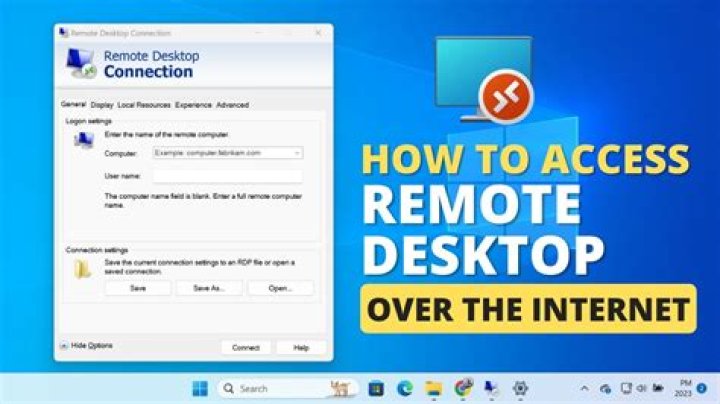
Methods to Access RPI Remotely
There are several methods to access your Raspberry Pi remotely. Each method has its own advantages and is suitable for different use cases. Below are the most popular options:
1. SSH (Secure Shell)
SSH is a widely used protocol for secure remote access. It allows you to connect to your RPI via the command line interface and execute commands remotely.
2. VNC (Virtual Network Computing)
VNC enables you to access the graphical user interface (GUI) of your RPI remotely. This method is ideal for users who prefer a visual interface over the command line.
3. Web Interface
Some applications and services running on your RPI can be accessed via a web browser. This method is convenient for monitoring and managing web-based projects.
Using SSH for Remote Access
SSH is one of the most popular methods for accessing Raspberry Pi remotely. It provides a secure and encrypted connection, making it ideal for sensitive operations.
Step-by-Step Guide
- Enable SSH on your Raspberry Pi by navigating to
Raspberry Pi Configuration>Interfaces>SSH. - Find your RPI's IP address using the
ifconfigorip addrcommand. - Install an SSH client on your computer (e.g., PuTTY for Windows or Terminal for macOS/Linux).
- Connect to your RPI by entering the command:
ssh pi@.
For added security, consider setting up SSH keys instead of using passwords. This eliminates the risk of brute-force attacks and ensures a more secure connection.
Setting Up VNC for Remote Access
VNC allows you to access the graphical desktop of your Raspberry Pi remotely. This method is particularly useful for users who prefer a visual interface over the command line.
Installation and Configuration
- Install the VNC server on your RPI by running the command:
sudo apt install realvnc-vnc-server realvnc-vnc-viewer. - Enable VNC by navigating to
Raspberry Pi Configuration>Interfaces>VNC. - Download and install the VNC Viewer application on your computer or mobile device.
- Connect to your RPI by entering its IP address in the VNC Viewer application.
VNC provides a seamless experience for users who need to interact with their RPI's graphical interface. However, it requires more bandwidth compared to SSH, so ensure your network connection is stable.
Accessing RPI via Web Interface
Some applications running on your Raspberry Pi can be accessed via a web browser. This method is particularly useful for monitoring and managing web-based projects.
Examples of Web-Based Applications
- Home Assistant: A popular home automation platform that provides a web interface for controlling smart devices.
- Pi-Hole: An ad-blocking DNS server that can be managed through a web dashboard.
- Nextcloud: A self-hosted cloud storage solution with a user-friendly web interface.
To access these applications remotely, ensure they are properly configured and accessible from your network. You may also need to set up port forwarding on your router to allow external connections.
Ensuring Secure Connections
Security is a critical consideration when accessing your Raspberry Pi remotely. Below are some best practices to ensure your connections remain secure:
- Use Strong Passwords: Avoid using default passwords and choose strong, unique credentials for your RPI.
- Enable Firewall: Configure a firewall to restrict unauthorized access to your RPI.
- Update Regularly: Keep your operating system and software up to date to protect against vulnerabilities.
- Set Up SSH Keys: Replace password-based authentication with SSH keys for added security.
By following these practices, you can minimize the risk of unauthorized access and ensure your RPI remains secure.
Troubleshooting Common Issues
Even with careful setup, you may encounter issues when accessing your Raspberry Pi remotely. Below are some common problems and their solutions:
1. Unable to Connect via SSH
- Ensure SSH is enabled on your RPI.
- Verify your RPI's IP address and ensure it is reachable from your network.
- Check your firewall settings and ensure port 22 is open.
2. VNC Connection Fails
- Ensure VNC is installed and enabled on your RPI.
- Restart the VNC server and try connecting again.
- Check your network connection for stability.
3. Web Interface Not Accessible
- Verify the application is running and configured correctly.
- Check your router settings and ensure the necessary ports are forwarded.
- Test the connection from within your local network first.
If the issue persists, consult the application's documentation or seek help from online forums and communities.
Conclusion and Next Steps
In conclusion, accessing your Raspberry Pi remotely is a powerful tool that enhances productivity and flexibility. By following the methods and best practices outlined in this guide, you can ensure a secure and reliable connection to your RPI from anywhere in the world.
We encourage you to experiment with different methods and find the one that best suits your needs. Don't forget to secure your connections and stay updated with the latest developments in remote access technology.
Feel free to leave a comment below if you have any questions or suggestions. Share this article with your friends and colleagues who might find it useful. For more in-depth guides and tutorials, explore our other articles on Raspberry Pi and related technologies.
Remember: Remote access is a powerful tool, but with great power comes great responsibility. Always prioritize security and ensure your connections remain protected.


