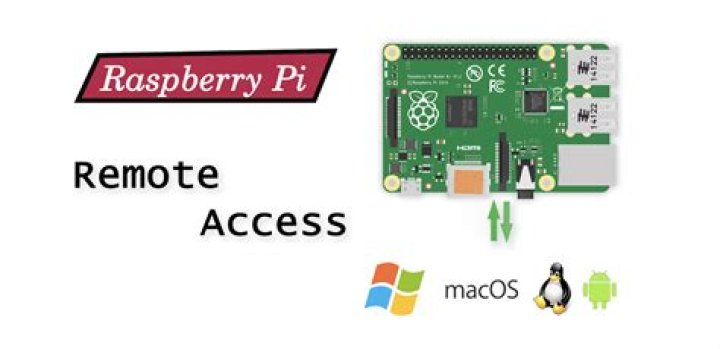
Accessing Raspberry Pi remotely from different networks is a powerful feature that opens up endless possibilities for remote management, automation, and monitoring. Whether you're a hobbyist, developer, or professional, understanding how to securely connect to your Raspberry Pi from anywhere is essential. In this article, we'll explore step-by-step methods, best practices, and security tips to ensure a seamless experience.
Remote access to Raspberry Pi allows users to control their devices without being physically present. This capability is particularly useful for managing IoT setups, running headless servers, or monitoring data in real-time. However, setting up remote access requires careful planning and attention to security protocols.
By the end of this guide, you will have a thorough understanding of the tools, techniques, and configurations required to establish secure connections. We'll also cover potential pitfalls and how to avoid them, ensuring your Raspberry Pi remains protected while providing remote access.
Introduction to Remote Access
Remote access to Raspberry Pi is a fundamental skill for anyone working with this versatile device. It allows you to manage your Raspberry Pi from anywhere in the world, as long as both devices are connected to the internet. This section will introduce the basic concepts and benefits of remote access, setting the stage for more advanced topics.
What is Remote Access?
Remote access refers to the ability to control one device from another over a network. In the context of Raspberry Pi, this means connecting to your Pi from another computer or mobile device, even if they are on separate networks. Common methods include SSH, VNC, and third-party tools like ngrok.
Why is Remote Access Important?
Remote access is crucial for several reasons:
- It eliminates the need for physical access, saving time and effort.
- It enables real-time monitoring and management of IoT devices.
- It enhances productivity by allowing you to work on projects from anywhere.
Why Access Raspberry Pi Remotely?
Accessing Raspberry Pi remotely offers numerous advantages, especially for users managing multiple devices or running server applications. This section will explore the specific benefits and use cases of remote access.
Use Cases for Remote Access
Here are some common scenarios where remote access to Raspberry Pi is beneficial:
- Home Automation: Control smart home devices and monitor sensors remotely.
- Web Hosting: Manage a web server hosted on Raspberry Pi without being physically present.
- Data Collection: Retrieve and analyze data from sensors or other connected devices in real-time.
Setting Up Your Network
Before you can access Raspberry Pi remotely, you need to ensure your network is properly configured. This section will guide you through the necessary steps to prepare your Raspberry Pi and network for remote access.
Step 1: Connect Raspberry Pi to the Internet
Ensure your Raspberry Pi is connected to the internet via Wi-Fi or Ethernet. You can check the connection by opening a terminal and running:
ping google.com
If the connection is successful, you'll see responses from Google's servers.
Step 2: Find the IP Address
To connect to your Raspberry Pi, you need its IP address. Use the following command in the terminal:
hostname -I
This will display the IP address assigned to your Raspberry Pi by the router.
Using SSH for Remote Access
SSH (Secure Shell) is one of the most popular methods for accessing Raspberry Pi remotely. It provides a secure and encrypted connection, making it ideal for remote management.
Enabling SSH on Raspberry Pi
To enable SSH on your Raspberry Pi, follow these steps:
- Open the terminal on your Raspberry Pi.
- Type
sudo raspi-configand press Enter. - Select "Interfacing Options" and enable SSH.
Connecting via SSH
Once SSH is enabled, you can connect to your Raspberry Pi from another device using an SSH client. On Windows, you can use PuTTY, while macOS and Linux users can use the built-in terminal. Use the following command:
ssh pi@
Replace
Accessing Raspberry Pi with VNC
VNC (Virtual Network Computing) allows you to access the graphical desktop of your Raspberry Pi remotely. This method is ideal for users who prefer a visual interface over the command line.
Installing VNC Server
To set up VNC on your Raspberry Pi, follow these steps:
- Open the terminal and type
sudo apt update. - Install the VNC server by running
sudo apt install realvnc-vnc-server realvnc-vnc-viewer. - Enable VNC by typing
sudo raspi-configand selecting "Interfacing Options" > "VNC" > "Enable."
Connecting via VNC
Download the VNC Viewer application on your remote device. Enter the IP address of your Raspberry Pi and log in using your credentials. You will now have access to the desktop environment.
Using ngrok for Easy Remote Access
ngrok is a popular tool that simplifies remote access by creating a secure tunnel to your Raspberry Pi. It eliminates the need for complex network configurations and port forwarding.
Installing ngrok
To install ngrok on your Raspberry Pi:
- Download the ngrok binary from the official website.
- Extract the file and move it to a directory in your PATH.
- Run
ngrok tcp 22to create a secure SSH tunnel.
Connecting via ngrok
ngrok will provide you with a unique URL that you can use to connect to your Raspberry Pi from anywhere. Simply use this URL in your SSH client to establish a connection.
Configuring Port Forwarding
Port forwarding allows you to access your Raspberry Pi directly from the internet by forwarding specific ports on your router to your Pi's IP address. This section will guide you through the process.
Step 1: Log in to Your Router
Access your router's admin interface by typing its IP address (usually 192.168.0.1 or 192.168.1.1) into a web browser. Log in using your credentials.
Step 2: Set Up Port Forwarding
Locate the port forwarding section in your router's settings and add a new rule:
- Service Name: SSH
- External Port: 22
- Internal IP Address: Your Raspberry Pi's IP address
- Internal Port: 22
Security Best Practices
Security is paramount when accessing Raspberry Pi remotely. This section will outline essential practices to protect your device from unauthorized access.
Use Strong Passwords
Ensure your Raspberry Pi is protected with a strong, unique password. Avoid using common or easily guessable passwords.
Enable Two-Factor Authentication
Consider enabling two-factor authentication (2FA) for an additional layer of security. Tools like Google Authenticator can be integrated with SSH for this purpose.
Troubleshooting Common Issues
Even with careful setup, issues can arise when accessing Raspberry Pi remotely. This section will address common problems and their solutions.
Issue: Unable to Connect via SSH
If you're unable to connect via SSH, check the following:
- Ensure SSH is enabled on your Raspberry Pi.
- Verify the IP address and port number.
- Check your firewall settings to ensure port 22 is open.
Issue: Slow Connection
A slow connection can be caused by network congestion or insufficient bandwidth. Try the following solutions:
- Upgrade your internet plan for better speed.
- Use a wired connection instead of Wi-Fi for your Raspberry Pi.
Conclusion and Next Steps
In this comprehensive guide, we've explored the process of accessing Raspberry Pi remotely from different networks. From setting up SSH and VNC to configuring port forwarding and using ngrok, you now have the tools and knowledge to manage your Raspberry Pi securely and efficiently.
Remember to prioritize security by using strong passwords, enabling two-factor authentication, and keeping your software up to date. For further learning, consider exploring advanced topics such as setting up a VPN or automating tasks with scripts.
We encourage you to share your experiences and tips in the comments below. If you found this article helpful, don't forget to share it with others who might benefit from it. Happy tinkering!


