Are you looking to access your Raspberry Pi remotely from anywhere using Windows 10? This comprehensive guide will walk you through the steps to achieve seamless remote access, ensuring you can manage your Raspberry Pi from any location with ease and security.
Remote access to your Raspberry Pi opens up endless possibilities, whether you're managing a home automation system, running a server, or accessing files remotely. In this article, we'll explore the best practices, tools, and configurations to set up remote access securely and efficiently.
By the end of this guide, you'll have a robust setup that allows you to access your Raspberry Pi from anywhere in the world using your Windows 10 device. Let's dive in!
Introduction
Remote access to Raspberry Pi is becoming increasingly popular among tech enthusiasts and professionals alike. It allows users to manage their devices without being physically present, which is especially useful for projects involving IoT, servers, or media centers.
Windows 10 provides several tools and methods to connect remotely to a Raspberry Pi, ensuring flexibility and convenience. Whether you're using SSH for command-line access or VNC for graphical interface control, this guide will cover everything you need to know.
Let's explore the various methods and tools that make remote access possible, starting with understanding the basics of Raspberry Pi.
Understanding Raspberry Pi Basics
Before diving into remote access, it's essential to understand the basics of Raspberry Pi. A Raspberry Pi is a small, affordable computer that can be used for a wide range of projects, from learning programming to building complex systems.
Key Features of Raspberry Pi
- Compact and energy-efficient design
- Supports multiple operating systems, including Raspberry Pi OS
- Compatible with various peripherals and accessories
- Ideal for educational purposes, hobbyists, and professional applications
For this guide, we assume you have a Raspberry Pi set up with Raspberry Pi OS and a stable internet connection. If not, consider setting up your Raspberry Pi before proceeding.
Remote Access Methods
There are several methods to access your Raspberry Pi remotely from Windows 10. The choice depends on your specific needs and the type of access required. Below are the most common methods:
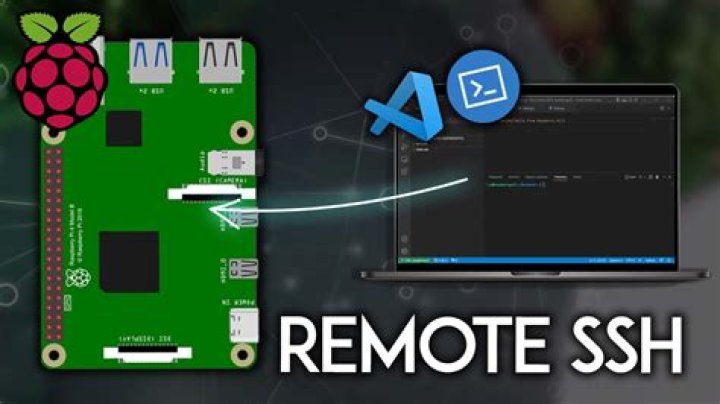
SSH for Command-Line Access
Secure Shell (SSH) is a protocol that allows you to access the command-line interface of your Raspberry Pi securely. It's ideal for tasks that don't require a graphical user interface.
VNC for Graphical Access
Virtual Network Computing (VNC) enables you to access the graphical desktop of your Raspberry Pi remotely. This method is perfect for projects requiring a visual interface.
Web-Based Access
Some applications allow you to access your Raspberry Pi through a web browser. This method is convenient but may require additional setup and configuration.
Setting Up SSH on Raspberry Pi
SSH is one of the most popular methods for accessing Raspberry Pi remotely. Follow these steps to enable SSH on your Raspberry Pi:
Enabling SSH on Raspberry Pi
- Open the Raspberry Pi Configuration tool by typing `sudo raspi-config` in the terminal.
- Navigate to "Interfacing Options" and select "SSH."
- Choose "Yes" to enable SSH and reboot your Raspberry Pi.
Once SSH is enabled, you can connect to your Raspberry Pi using an SSH client on Windows 10, such as PuTTY or Windows Terminal.
Configuring Port Forwarding
To access your Raspberry Pi from outside your local network, you need to configure port forwarding on your router. This process allows external devices to connect to your Raspberry Pi through your router.
Steps to Configure Port Forwarding
- Log in to your router's admin panel using its IP address.
- Locate the "Port Forwarding" section and create a new rule.
- Set the external port to 22 (default SSH port) and the internal IP address to your Raspberry Pi's local IP.
- Save the changes and test the connection.
Port forwarding is crucial for remote access, but ensure your router's firewall settings allow incoming connections on the specified port.
Using Dynamic DNS for Remote Access
If your internet service provider assigns a dynamic IP address, it can be challenging to maintain a stable remote connection. Dynamic DNS (DDNS) services help by mapping your changing IP address to a static domain name.
Setting Up DDNS
- Choose a reliable DDNS provider, such as No-IP or DuckDNS.
- Create an account and set up a hostname for your Raspberry Pi.
- Install the DDNS client on your Raspberry Pi to update the hostname automatically.
With DDNS, you can access your Raspberry Pi using a memorable domain name instead of an IP address.
Setting Up VNC for GUI Access
VNC allows you to access the graphical desktop of your Raspberry Pi remotely. Follow these steps to set it up:
Installing VNC Server
- Open the terminal on your Raspberry Pi and type `sudo apt update` followed by `sudo apt install realvnc-vnc-server realvnc-vnc-viewer`.
- Enable the VNC service by navigating to "Preferences" > "Raspberry Pi Configuration" > "Interfaces" and selecting "VNC."
Connecting with a VNC Client
- Download and install a VNC client on your Windows 10 device, such as RealVNC Viewer.
- Enter your Raspberry Pi's IP address or hostname and log in using the appropriate credentials.
VNC provides a seamless graphical interface for remote management, making it ideal for complex tasks.
Implementing Security Measures
Security is paramount when accessing your Raspberry Pi remotely. Follow these best practices to protect your device:
Change Default SSH Port
Changing the default SSH port (22) to a non-standard port reduces the risk of unauthorized access.
Use Strong Passwords
Ensure your Raspberry Pi's login credentials are strong and unique. Consider enabling two-factor authentication for added security.
Regularly Update Software
Keep your Raspberry Pi's operating system and applications up to date to protect against vulnerabilities.
Troubleshooting Common Issues
Even with proper setup, you may encounter issues while accessing your Raspberry Pi remotely. Below are some common problems and their solutions:
Connection Refused
Ensure SSH or VNC is enabled and your Raspberry Pi's IP address is correct. Check your router's port forwarding settings.
Slow Connection
Optimize your network settings and ensure your Raspberry Pi has a stable internet connection. Use wired connections if possible.
Authentication Failed
Verify your login credentials and ensure they match those set on your Raspberry Pi. Disable password authentication and use SSH keys if preferred.
Conclusion
Accessing your Raspberry Pi remotely from anywhere on Windows 10 is a powerful capability that enhances its utility. By following the steps outlined in this guide, you can set up a secure and efficient remote access system tailored to your needs.
Remember to prioritize security and regularly update your Raspberry Pi to protect against potential threats. We encourage you to share your experiences and tips in the comments below. Don't forget to explore other articles on our site for more Raspberry Pi-related content!